7 Best Winches for Off-Road Recovery: Review & Guide
Installing a front bumper with a winch mount can dramatically improve your off-road vehicle’s protection, functionality, and appearance. This step-by-step guide provides all the information you need for a successful DIY installation. Learn the necessary tools, techniques, and safety precautions to enhance your vehicle's capabilities and customize your ride with confidence.
Why Install a Front Bumper with Winch Mount? The Benefits Explained
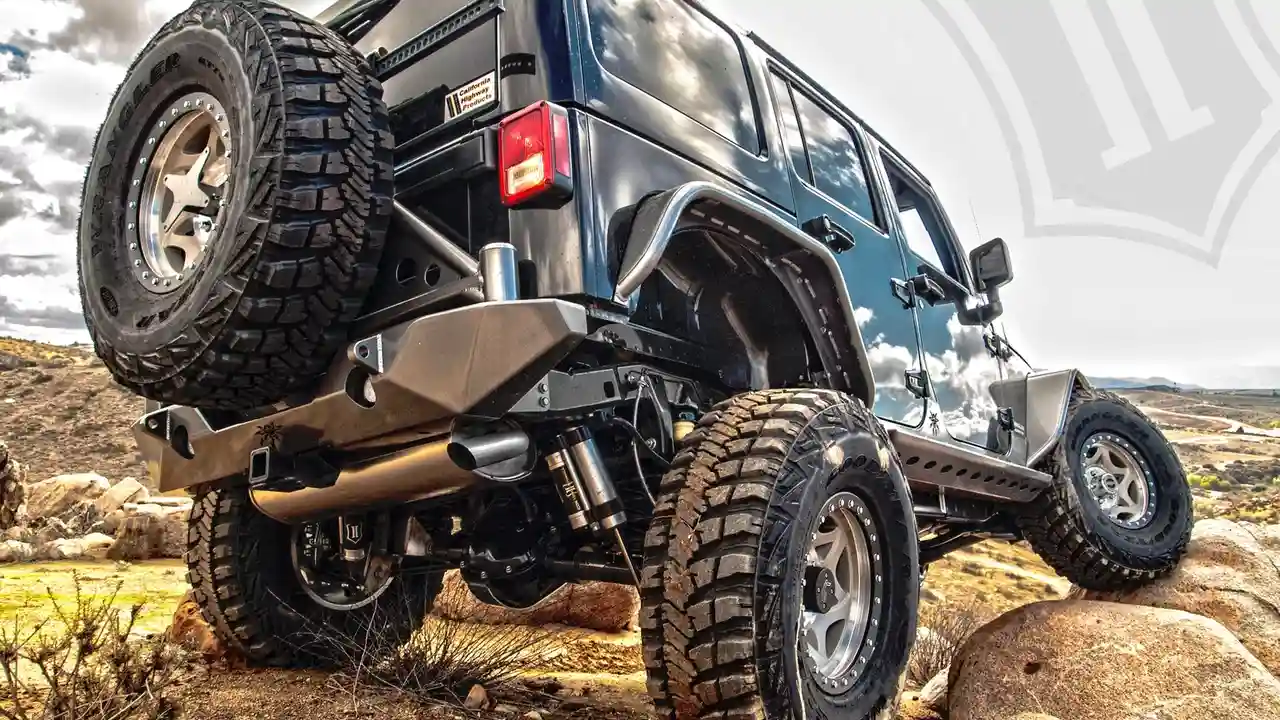
So, you're thinking about slapping a new front bumper on your rig, huh? Good call! It's not just about looking tougher; a good aftermarket bumper offers some serious advantages. Let's break down why this upgrade is a game-changer for any serious off-roader.
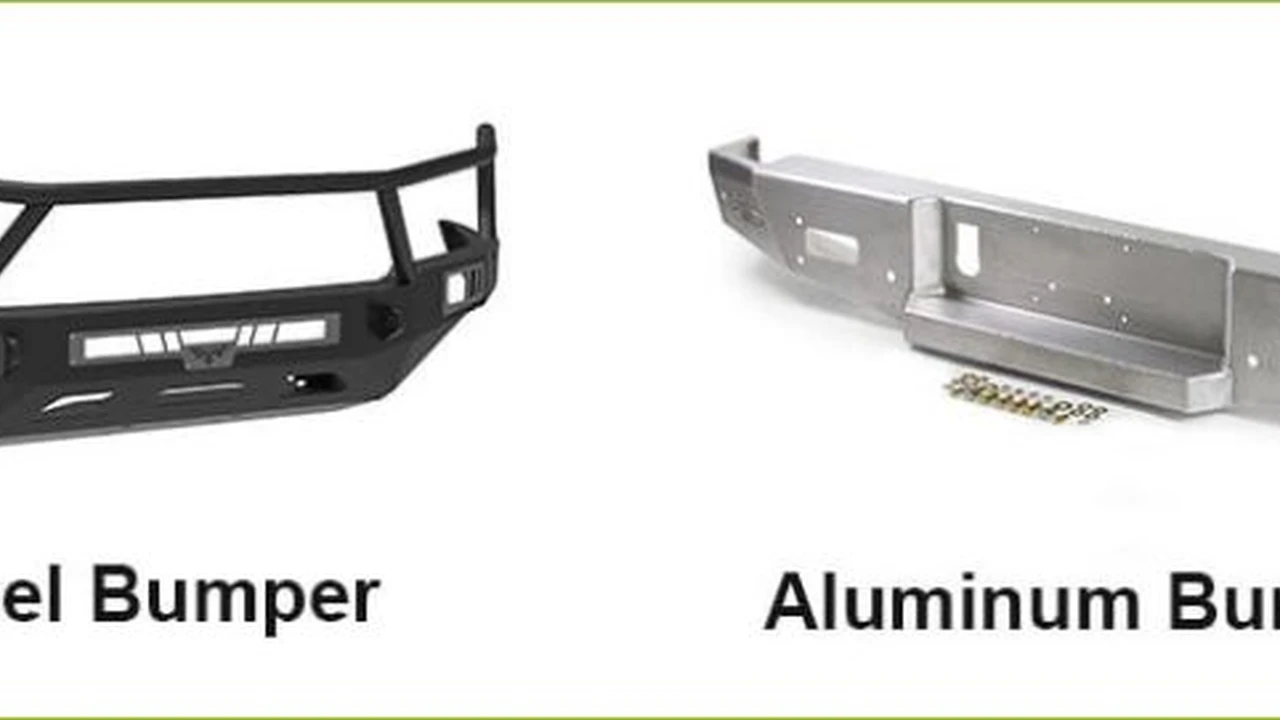
- Enhanced Protection: Stock bumpers are often flimsy plastic. An aftermarket steel bumper provides superior protection against rocks, trees, and other trail hazards. Think of it as a shield for your radiator, headlights, and even your engine in some cases.
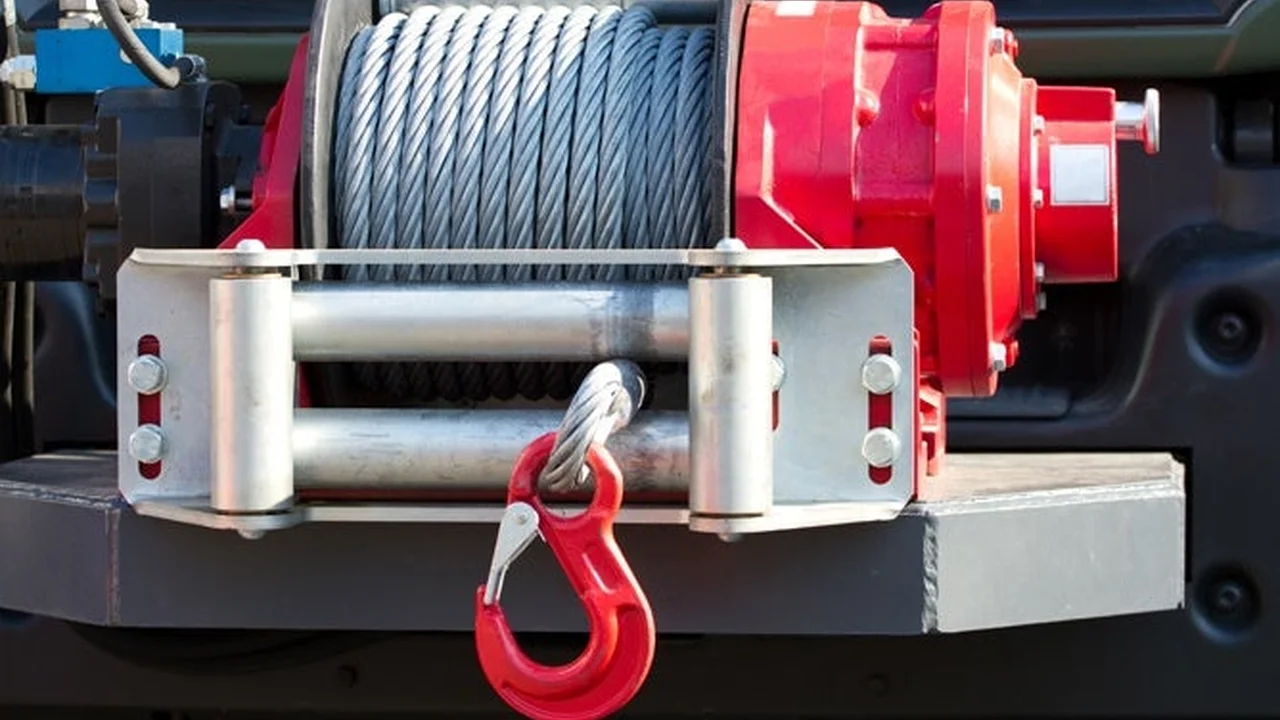
- Winch Mounting: This is the big one. A winch is a lifesaver when you're stuck in mud, sand, or snow. A bumper with a winch mount provides a secure and stable platform for your winch, allowing you to self-recover or assist others.
- Improved Approach Angle: Many aftermarket bumpers are designed with a higher clearance and a more aggressive approach angle. This means you can tackle steeper obstacles without scraping your bumper.
- Auxiliary Lighting: Many bumpers include mounting points for auxiliary lights, like fog lights or driving lights. This dramatically improves visibility during nighttime off-roading.
- Aggressive Appearance: Let's be honest, a beefy aftermarket bumper looks awesome. It instantly transforms the look of your vehicle and gives it a more capable and rugged appearance.
Tools and Materials Needed for Front Bumper Installation
Alright, before you start wrenching, make sure you have everything you need. This isn't a job you want to be halfway through and realize you're missing a critical tool. Here’s a comprehensive list:
- New Front Bumper with Winch Mount: Obviously! Make sure it's compatible with your vehicle.
- Winch (if installing one): Choose a winch with the appropriate pulling capacity for your vehicle's weight.
- Socket Set: Metric or SAE, depending on your vehicle. A good set with various sizes is essential.
- Wrench Set: Again, metric or SAE, matching your socket set.
- Torque Wrench: Critical for tightening bolts to the manufacturer's specifications. Over-tightening can damage threads, and under-tightening can lead to loose bolts.
- Pry Bar: Helpful for aligning the new bumper during installation.
- Hammer or Mallet: For gently persuading stubborn parts into place.
- Safety Glasses: Protect your eyes from flying debris.
- Gloves: Protect your hands from sharp edges and grease.
- Floor Jack and Jack Stands: To safely lift and support your vehicle. Never work under a vehicle supported only by a jack!
- Wheel Chocks: To prevent the vehicle from rolling.
- Measuring Tape: For accurate alignment.
- Pen or Marker: For marking bolt locations.
- Wiring Tools (if installing lights or winch): Wire strippers, crimpers, and electrical tape.
- Multimeter (if wiring lights or winch): To test electrical connections.
- Angle Grinder (optional): May be needed to trim the factory bumper or brackets.
- Cutting Oil (optional): If using an angle grinder.
- Penetrating Oil: To loosen stubborn bolts.
- Anti-Seize Lubricant: To prevent bolts from seizing in the future.
- Shop Rags: For cleaning up spills and grease.
- Instruction Manual: The bumper manufacturer's instructions are essential. Read them carefully before starting.
Step-by-Step Guide: Installing Your New Front Bumper
Okay, let's get down to business. Follow these steps carefully, and you'll have your new bumper installed in no time. Remember to consult the manufacturer's instructions for your specific bumper, as there may be slight variations.
- Preparation is Key:
- Park your vehicle on a level surface.
- Engage the parking brake and chock the rear wheels.
- Disconnect the negative battery cable to prevent electrical shorts.
- Gather all your tools and materials.
- Read the bumper manufacturer's instructions thoroughly.
- Remove the Factory Bumper:
- Locate the bolts securing the factory bumper to the frame.
- Use a socket wrench to remove the bolts. Penetrating oil can help loosen stubborn bolts.
- Carefully remove the factory bumper. It may be heavy, so get a friend to help.
- Disconnect any wiring harnesses connected to the factory bumper, such as fog lights or parking sensors.
- Set the factory bumper aside. You may need it later if you decide to reinstall it.
- Prepare the Frame:
- Inspect the frame for any damage or rust. Repair any damage before proceeding.
- Clean the frame mounting points with a wire brush to remove any dirt or debris.
- Apply anti-seize lubricant to the new bumper's mounting bolts.
- Install the New Bumper:
- Carefully lift the new bumper into place, aligning the mounting holes with the frame. A floor jack can be helpful for lifting the bumper.
- Insert the mounting bolts and tighten them loosely by hand.
- Use a pry bar to align the bumper properly.
- Once the bumper is aligned, tighten the mounting bolts to the manufacturer's specifications using a torque wrench.
- Install the Winch (if applicable):
- Follow the winch manufacturer's instructions for installation.
- Mount the winch to the winch plate on the bumper.
- Connect the winch's power cables to the battery, following the manufacturer's instructions. Be sure to use the correct gauge wiring.
- Test the winch to ensure it is functioning properly.
- Install Auxiliary Lights (if applicable):
- Mount the auxiliary lights to the bumper's mounting points.
- Wire the lights to a power source, following the manufacturer's instructions.
- Test the lights to ensure they are functioning properly.
- Final Checks:
- Double-check all bolts to ensure they are properly tightened.
- Reconnect the negative battery cable.
- Test all lights and the winch to ensure they are functioning properly.
Product Recommendations: Top Front Bumpers with Winch Mounts
Choosing the right bumper can be overwhelming with so many options available. Here are a few of our top picks, considering different budgets and needs:
Budget-Friendly Option: Smittybilt XRC Front Bumper
Description: The Smittybilt XRC is a popular choice for budget-conscious off-roaders. It offers a solid steel construction, a winch mount, and decent protection. It's a great entry-level bumper that gets the job done without breaking the bank.
Pros: Affordable, durable, winch-ready.
Cons: Finish may not be as durable as more expensive options, can be heavy.
Typical Price: $400 - $600
Ideal Use Case: Weekend warrior who needs a functional and affordable bumper.
Mid-Range Option: ARB Deluxe Front Bumper
Description: ARB is a well-respected brand known for its high-quality off-road products. The ARB Deluxe bumper offers excellent protection, a winch mount, and integrated light mounts. It's a more refined option than the Smittybilt, with a better fit and finish.
Pros: Excellent protection, durable finish, integrated light mounts, airbag compatible (on some models).
Cons: More expensive than budget options, can be heavy.
Typical Price: $1000 - $1500
Ideal Use Case: Serious off-roader who needs reliable protection and functionality.
Premium Option: Warn Rock Crawler Front Bumper
Description: Warn is a legendary name in the winch and off-road accessory world. Their Rock Crawler bumper is built for extreme conditions, offering maximum protection and a rugged design. It's the top-of-the-line option for those who demand the best.
Pros: Maximum protection, extremely durable, winch-ready, stylish design.
Cons: Very expensive, can be extremely heavy.
Typical Price: $1500 - $2500+
Ideal Use Case: Hardcore off-roader who needs the ultimate in protection and performance.
Front Bumper Comparison: Smittybilt vs. ARB vs. Warn
Let's take a closer look at how these bumpers stack up against each other:
| Feature | Smittybilt XRC | ARB Deluxe | Warn Rock Crawler |
|---|---|---|---|
| Price | Affordable | Mid-Range | Premium |
| Protection | Good | Excellent | Maximum |
| Durability | Good | Excellent | Extremely Durable |
| Weight | Heavy | Heavy | Very Heavy |
| Features | Winch Mount | Winch Mount, Light Mounts | Winch Mount |
| Finish | Powder Coat | Powder Coat | Powder Coat |
Choosing the Right Winch for Your Bumper
If you're installing a winch, you need to choose one that's properly sized for your vehicle. A good rule of thumb is to multiply your vehicle's gross vehicle weight (GVWR) by 1.5. This will give you the minimum pulling capacity you need.
Example: If your Jeep Wrangler's GVWR is 5,000 lbs, you'll need a winch with a pulling capacity of at least 7,500 lbs.
Also consider the type of winch line. Synthetic rope is lighter and safer than steel cable, but it's also more expensive.
Wiring Considerations for Lights and Winches
When wiring auxiliary lights or a winch, use the correct gauge wiring to handle the amperage draw. Consult the manufacturer's instructions for the recommended wire gauge. Always use a fuse or circuit breaker to protect the wiring from overloads.
Safety Precautions During Installation
Safety is paramount. Always wear safety glasses and gloves. Never work under a vehicle supported only by a jack. Use jack stands to support the vehicle securely. Disconnect the negative battery cable to prevent electrical shorts.
Maintaining Your New Bumper
To keep your bumper looking its best, wash it regularly with soap and water. Apply a coat of wax to protect the finish from rust and corrosion. Inspect the bumper regularly for any damage or loose bolts. Tighten any loose bolts as needed.
:max_bytes(150000):strip_icc()/277019-baked-pork-chops-with-cream-of-mushroom-soup-DDMFS-beauty-4x3-BG-7505-5762b731cf30447d9cbbbbbf387beafa.jpg)